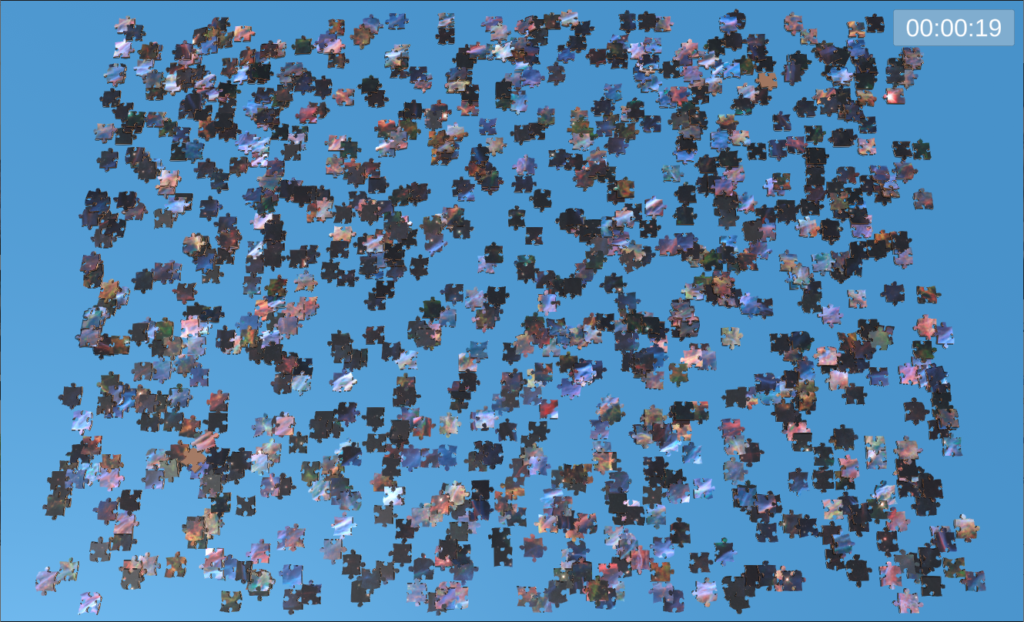
I always liked jigsaw puzzles. I also have an issue with them.. I don’t enjoy finishing them more than once. So when finished, I need to donate my puzzles and find new ones. At some point, I got a craving of working on a puzzle, but didn’t have any on hands. So instead of driving for a few minutes to get a new one, I decided to spend weeks to create a puzzle game that would have infinite replayability.
So I opened my favorite game development software, Unity, and started a new 3D project.
Concept
The main idea was to build a game that creates a jigsaw puzzle based on a given picture and a number of pieces. With such a game, I wouldn’t need to buy or borrow puzzles anymore, since I could always make my own any time I wanted. Ok, there will always be something a digital puzzle can’t replicate from the real world. For example, typical puzzles of 5000 pieces or more can get very large, so when replicated on a computer screen, we can’t see the whole thing all at once, which limits the experience. The game could potentially be played on a very large touch screen display, but that was not the target goal.
Desired Features
The minimum features I wanted in this puzzle game were:
- The ability to choose the puzzle image
- The ability to set the desired number of puzzle pieces
- The ability to save and load a puzzle
- The ability to move around the pieces and zoom in and out
With this, I was confident that I would have a realistic and achievable target. Working on a project solo can sometimes be hard to keep the motivation up. So keeping the project to a minimum feature set is a good idea initially.
Modeling the Pieces
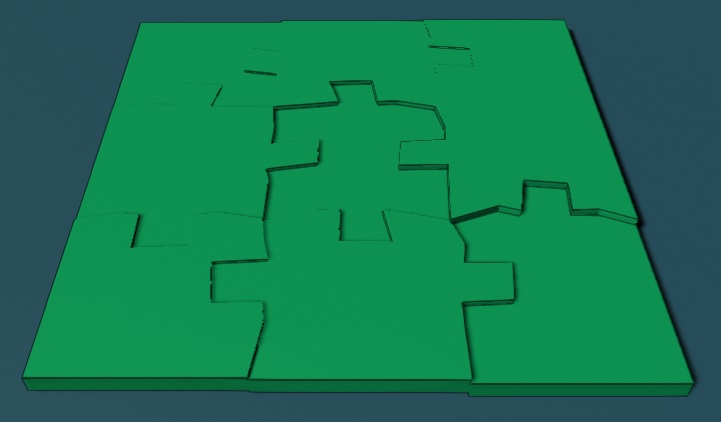
There are typically two things that define a puzzle’s difficulty: the number of pieces and the shape of the tabs/blanks. A puzzle with physically identical pieces of similar color would make you try endless combinations before correctly placing a piece. While it can probably be enjoyed by some, having variations in the shape of the pieces’ tabs and blanks is preferred. There’s satisfaction in spotting a tiny detail in the shape of a piece, spotting a possible match and realizing it fits perfectly. If all the shapes were the same, it would simply be trial and error until you get the right one, which is less fun. Anyways, it’s my opinion.
I didn’t want to model multiple different piece shapes, so I decided to make everything procedural. In other words, every single puzzle pieces will be unique, being created from scratch from an algorithm. In this algorithm, some noise and randomness will be used to add variability.
As a high level summary, here are the different classes that are involved in the puzzle creation:
UIManager | Unique class managing the interactions between UI menus. Tells GameManager to start a puzzle on player input. |
GameManager | Unique class that manages the high-level interactions between components. Calls PuzzleGrid to trigger the generation of a new puzzle. |
PuzzleGrid | Unique class that creates and keeps a list of all instances of PuzzlePiece. Each puzzle piece is given a set of XZ coordinates (Y is the default top-down axis in Unity), is made aware of its neighbors and is assigned an edge type (tab, blank or nothing) for each face based on a hash grid. Additionally, the PuzzleGrid resizes the puzzle table based on the size of the puzzle. Finally, it randomly spreads the puzzle pieces on the table. |
PuzzlePiece | Class managing an individual puzzle piece. During its creation, a top mesh and a bottom mesh are triangulated, based on the neighbors and edge types. The class also manages the piece selection and the interaction with other pieces, such as the creation of a PuzzlePieceGroup when matching pieces are locked together. |
PuzzlePieceGroup | Class managing the selection and movement of a group of puzzle pieces locked together. |
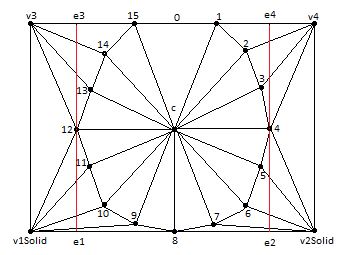
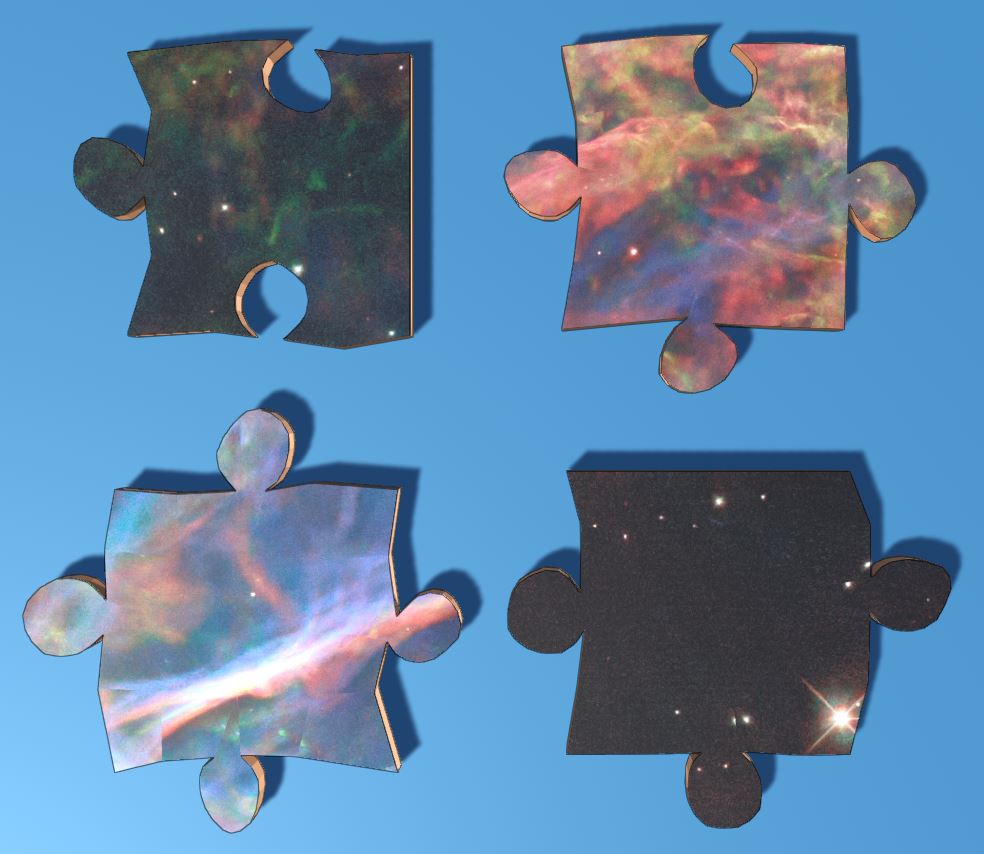
Of course, many others classes and components exists in the project, but those are the important ones when it comes to creating the puzzle. To have decent looking puzzle pieces, lots of time was spent in the mesh triangulation part of the code. The design of the tabs and blanks was incremental and started from a simple square, to initially keep things simple. Progressively, the initial square was changed into a polygon with 16 sides that approximated a circle (see image below). More vertices could potentially be added, but I considered 16 as a good balance between nice looking tabs/blanks and performance. As previously mentioned, a little bit of randomness was added to make the shapes interesting and unique.
User Interface
Of course, the game needed a user interface (UI) to allow for player inputs. For now, I implemented a very simple, self-descriptive, and functional UI without any art or graphics. This is mainly because I am a way better programmer than I am an artist.
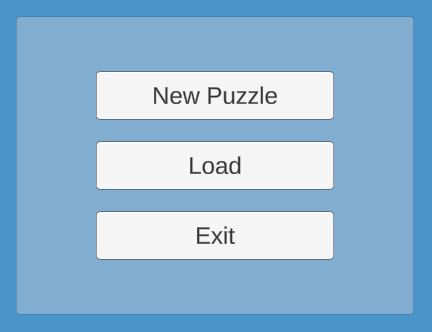
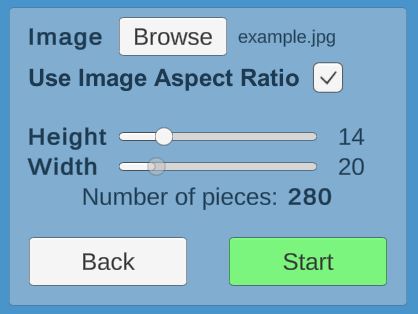
When choosing to create a new puzzle, the player can select it’s own image to use for the puzzle. A special shader is used to apply the image on the puzzle pieces, based on their initial XZ coordinates. For those seeking a challenge, when no image is selected, all pieces will be of the same color.
In order to avoid deforming the selected image, the player can choose to restrict the overall size of the puzzle by checking the “Use Image Aspect Ratio” checkbox. This will update the “Width” slider automatically, based on the puzzle “Height” selected by the player. When left unchecked, both “Height” and “Width” can be set manually by the player. Finally, the total number of pieces is displayed, which is a good indicator of how difficult the puzzle will be.
The Save & Load feature uses currently only one saved file. In the near future, I’ll be adding a list for each, so the player can pick a specific file to save or load. To implement the save functionality, the following information needed to be serialized:
- Elapsed time
- Number of pieces in X and Z
- Seed used to create the pieces
- Position and rotation of pieces
- Lists of grouped pieces
- The image selected by the player
With this information in a file, loading a saved file was pretty easy. Only a little bit of code refactoring was needed to reuse existing methods.
Table Management
I wanted the game to look a little like a real table setup. This means that the player has a limited area on which the puzzle can be made. Originally, I had implemented edges to avoid pieces falling from the table, but it created other issues. Instead, I decided to go with a strip around the table where the player simply can’t place pieces. This strip was colored darker than the table, which also makes for a simpler look than the edges.
To complete a jigsaw puzzle, we need to group pieces together. By using the left mouse button, the player has to select a puzzle piece, which will attach said piece to the cursor. Then, the player can click next to another piece to try to match them. A successful match will occur if the two pieces recognize each other as neighbors (see Modeling the Pieces). When successfully matching two or more pieces together, a group is created and the pieces involved become children of this group. From now on, only the group can be selected and moved, not it’s pieces. The same principle applies when trying to match a group with other pieces, except that the algorithm will run for every piece contained in the group.
The left mouse button is also used to simply place the selected object (a piece or a group) on the table. However, this can only be done if no other pieces are on the table at that location. I originally intended to use the right mouse button to drop (using physics) the selected piece, allowing for piece stacking. But I decided to go against this idea later on. Instead, I implemented an algorithm that push nearby pieces, allowing the selected object to be placed on the table. Of course, this has some downsides, such as pieces can be pushed to the same location as other pieces on the table. But this is not a big problem, so I am still unsure if I will decide to address it or not.
Ongoing Tasks & Issues
- [Issue] Once finished, a puzzle image is not seamless. There are discontinuities in the image.
- [Issue] Zooming with a selected piece or group breaks the position of the selected object.
To be continued…
